Sunday, August 25, 2019

Bunker Renovation

What a busy summer it has been!  Attending local Chapter meetings, working on Chapter business, volunteering at our local Korn Ferry Tour event, attending the University of Missouri Turf Field Day, along with just normal maintenance items at our course, and thanks to Rain Bird Golf Irrigation, a quick trip out to the U.S. Open.  With all these events, which have pictures, I really had some material to post.  Just finding the time, with my limited skills at blogging, sadly most of this summer's fun has not found it here to my blog.  Anybody who follows me on Twitter @3sticksCGCS would have seen pictures of all of this summer's action.  Also some of the local superintendent chapter events can be found by visiting www.ozarkturf.org and checking out our news section.  If I don't have new items to post regularly, I really should go back and visit some of the events of the season.

We set aside time and money to renovate one bunker per season.  We figure at that rate, all bunkers will be renovated once every 14 years.  Most bunkers are figured to last just 7-10 years before a renovation is needed.  This year's staffing at our course was a little light, we had one of our students come back in a very limited role, as he was taking classes, and another was working at an internship, which eventually caused him to leave earlier than planned.  This prevented us from starting one of our yearly project that we budget for, renovating a bunker.   Once our one student finished up his classes, and we were able to replace our other student, we set out to get that bunker renovation done before all of our summer students, headed back to school and those that stayed in town, would revert to their limited work schedules.

We have just 14 bunkers on our course, and we have renovated all but 3 of them in the past 10 years.  One greenside bunker and our two fairway bunkers, since they haven't been holding water.  The first 9 bunkers we did, we would clean out the old sand, clean out the drain, or replace it if needed, and then add fresh sand.  We had been using the same sand that we topdress with.

 
Both the above pictures have bunkers containing fresh topdressing sand.  These bunkers were renovated in 2015. 


In 2016, our three course facilities decided to switch sands to a little heavier coarser "Osage Bunker Sand"  I wasn't a big fan of it, more so because the price was double, and there was some concern when it got splashed out on to the green, it wasn't the same sand as our topdressing sand.  But bunkers with higher slopes and the topdressing sand also became contaminated with silt and clay when it would wash off the slopes in high rain events.  This contaminated sand was finding it's way onto our greens areas also.  Since the switch, we have noticed there has been less movement of the sand in heavy rain events.  If we see the sand starting to affect greens performance, we will go in to those areas and core aerate to remove the poor material and place fresh sand in its place.    


Bunkers with the Osage Bunker Sand installed.  The two top pictures show the built up lip that we failed to remove.  The top bunker was renovated in 2016, the bottom picture 2017.  

 We installed this new sand in our first bunker in the summer of 2016, and found it wasn't washing out with the heavy rains, we did our second bunker in 2017.  We just did our third bunker with this sand last week, and we are really excited to see how it works in this bunker, as it has one of the higher slopes.  This bunker was actually the first bunker we had refurbished in 2008, our first bunker renovation since I had arrived in 2003.  I'm sure I have pictures on a disc somewhere, since it was done back before we had cameras in our phones.


The above pictures show before we started the renovation.  The topdressing sand in the bunker had been washed off the back slope many times, causing it to become contaminated with clay and silt.  Also in the middle picture the build up on the edge can be clearly seen.

The one big difference we did with this recent bunker renovation, was take down the sand that had built up on the lip area where we would enter and exit the bunker.  On previous renovations, we had failed to remove that sand build up, but as we continue to renovate bunkers with our new "Osage Bunker" sand, we will knock down those lips.


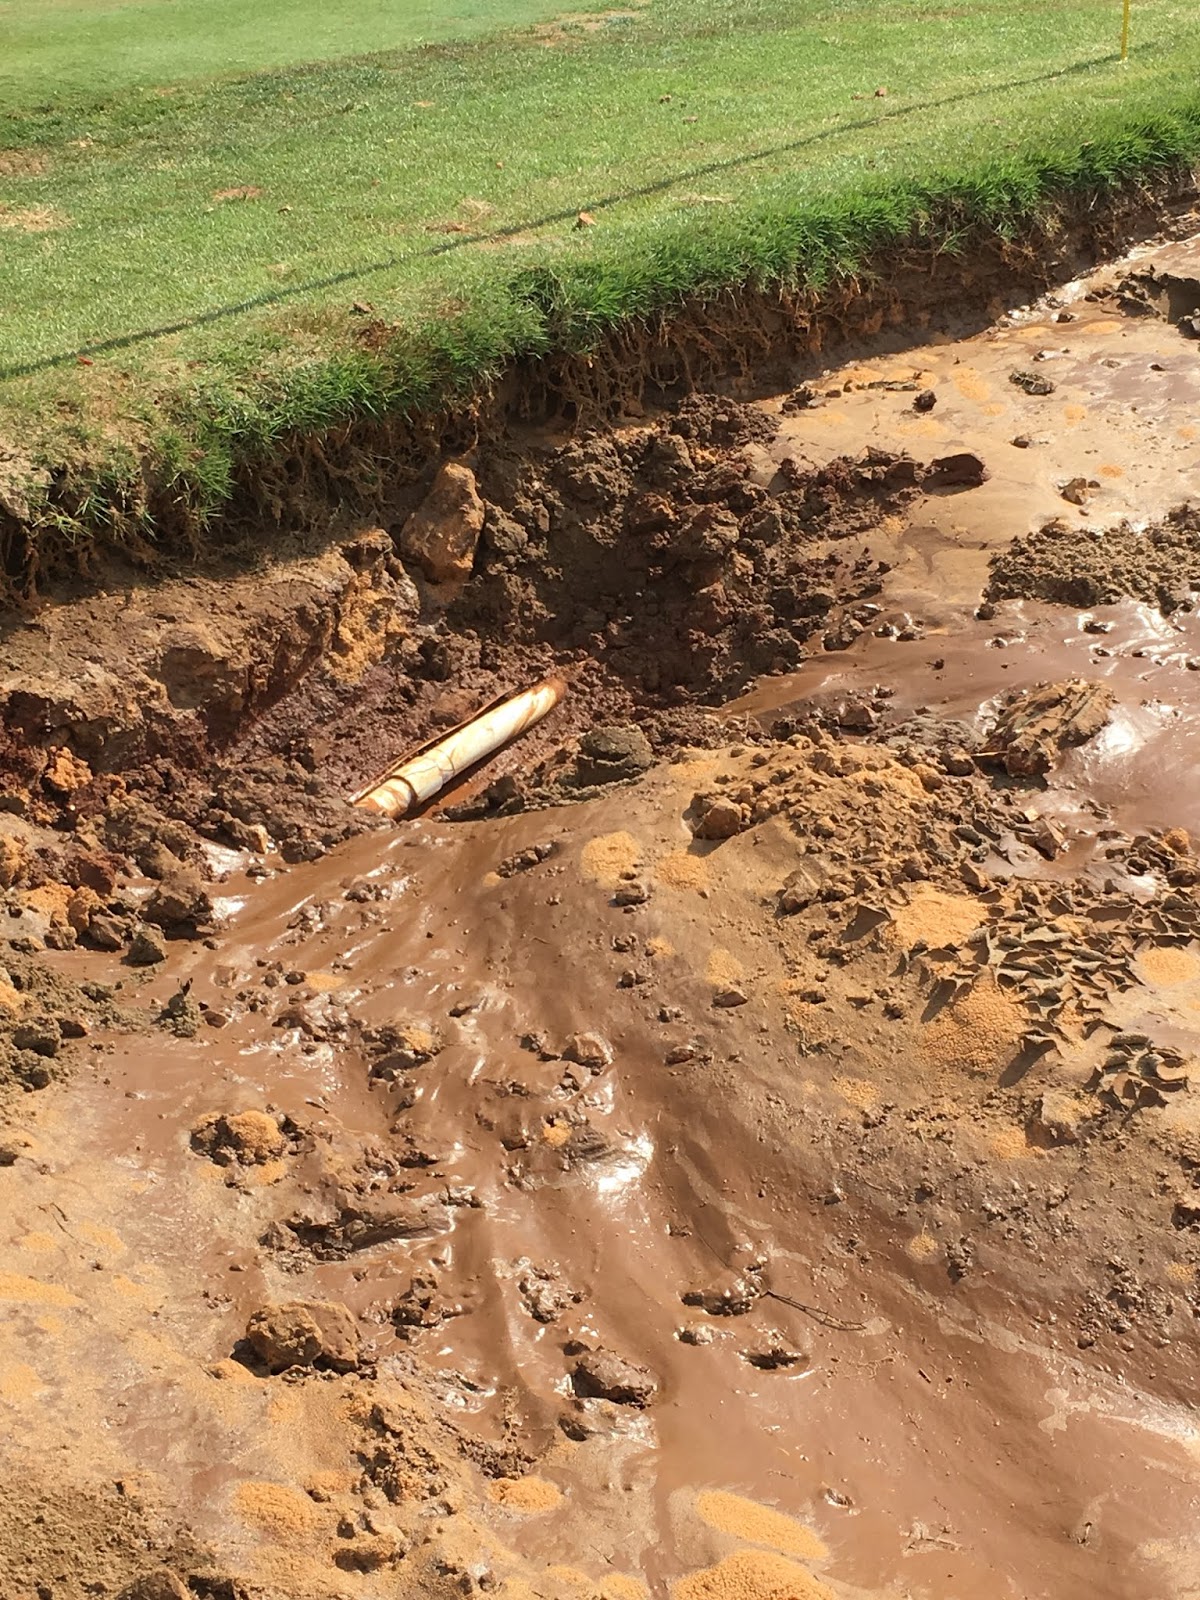
In the above pictures, it shows the rock and clay in the base of the bunker.  The middle picture is the drain pipe that the original contractor used, PVC sewer pipe.  We replaced it with black perforated pipe and back filled the trench with fresh pea gravel.  Yes, that is an irrigation line there in the corner of the bunker which we hit and had to repair.  


The finished product.  We stole some zoysia sod off our lowest driving range tee, that rarely gets used, for that first strip.  We then took some fescue sod out of our turf plots for the next few passes, and then feathered out the slope and seeded with fescue.  Just using what we had available on hand to finish the project.  I estimate the cost to be about $1,300 not counting labor.  

We will continue to look into renovating a bunker per year as our budget allows.  The other main projects we try to do yearly is to relevel some tees and top with fresh sod, and we are also looking into adding some tees for Seniors.

Thanks for reading!

Mel
 

Wednesday, May 29, 2019

Big Hole Outing

Just a little over a week ago, our course tried something new.  Some history that lead to it, at our regular Ozark Turf Association Scholarship and Research Outings, we would have a large hole cut on one of the par 3's.  If we got in the game, we could play to that hole, which was near the front of the green, while the regular hole was on the back.  Not to say it was easy though, one year we had to use our mulligan to make birdie from about 10 feet.  We were left of the pin, and there was just enough of a slope to challenge us.  Another reason was some networking at the Orlando Golf Industry Show in 2017, there was a lot of talk about different ideas to encourage new play.  I decided to invest in a 9 hole set of 8" cups.  The cups themselves were pretty inexpensive, and worst case scenario, we could always use the cup cutter to repair greens if needed.  If I remember the investment was about $200 dollars.  This led to our course hosting a Big Hole Tournament.

When working with the Pro Shop on what holes to use the Big Holes, the first decision was since it was a small group, they wanted to do a reverse shotgun, starting on # 1 and working backwards to about #15.  We were concerned that on 4 holes on the front nine had soil greens and we weren't sure how hard it would be to cut holes in them, we did find them just as easy as on our USGA greens.  So we cut all of them on the front nine.  We did find one issue, with the breeze that day and the 7 1/2' flag poles, the edge of the cup would pull out slightly.  When the pin was removed, the cup sat just under the green surface.  I shared this issue on Twitter and it was suggested to use long nails in the drainage hole of the cup to hold the cup down.  We will give this a try before the next tournament.  


Once all play passed the big holes, two of our crew members removed the big cups and replaced the plug.  This allowed the course to be ready for the regular play that followed the Big Hole Tournament.  A lot of care had to be taken to replace the plug, extra greens mix had been removed because the cup cutter itself didn't quite cut deep enough.  They were able to replace the plugs in front of play with great results.  New cups were cut when the big hole was being cut as well, and then "capped" during play for the big hole.  the "cap" was removed and the hole ready for play.  The picture on the left shows the big plug replaced and leveled.


Players had a great time, and it was fun to watch how aggressive they were putting at the 8" cups.  Play itself was a two person scramble, with two putt maximum, so really aggressive putting should rule regardless of the holes with the regular sized cup or the big hole.  Another interesting stat was not all scores on the front nine with the big cups were the lowest.  The Big Hole tournament was something different and we will host it again in the future.


Thanks for reading!

Mel


Wednesday, May 15, 2019

Some new winter projects

With the early start to winter, and with the length of it, along with an additional full-timer, we were able to get our regular winter projects of ballwasher repairs and painting, yardage posts, tee markers, and other golf accessories done fairly early.  So what did we move onto to keep us busy?

Entrance signs:  We have an entrance sign, that upon closer inspection, had faded some after over 15 years.  I'm not sure when it was installed, but I've been here 15+ years.

We removed the sign and refurbished it.  The first picture on the left is after it received a good pressure washing.  and the next showed the process of painting the background.


These pictures show the sign after it had been painted.


Here is the sign reinstalled along with a new block bed that replaced the rotted out railroad tie bed that had surrounded the sign before.  We had it reinstalled just in time for this year's Masters Tournament.  This block bed was done by one of our Park's Operations crew.  They will be adding dirt and plant material in the near future.


The Horton Smith sign stood in front of our flagpole, after we had removed that sign, we found the standard park issue welcome sign, that was acting as the frame.  For some reason, I felt that sign had some historic significance and I wanted to display it in some manner. (also I'm cheap and hated just throwing it out),  We as a crew, decided to take ownership of it, we refinished it, and found a spot to display on our gate at our maintenance facility. The old rotting railroad tie bed can be seen in the picture on the left.    

We made note of some rotting railroad ties at the first tee, and one of our staff remembered some retaining wall block at another facility, that was not being used.  We gladly confiscated the block and the crew created a new retaining wall on our first tee.  This is probably one of our bigger projects we had taken on since I had been here.


We removed the rotten railroad ties, and a bed that was the bricks were used as a boarder.  Carts were always running into them and knocking them loose.  We removed that bed and the need for the brick border.  We installed the retaining wall block and finished the project with most cost just being labor.  We did have to buy 15 blocks to finish up the project, so the cost of materials was $63.00  The guys took ownership of all these projects.  I just suggested that we wanted to fix up what was there, and the guys took it from there.


I'm pretty proud of these guys, they always take pride and ownership of the many projects we do.

As always,

Thanks for reading!

Mel


Sunday, April 28, 2019

Spring Training

Over the past few years, our Park's Operations Superintendent, (who is our employer's supervisor over the golf maintenance operations), has always promoted staff training.  We have trained on a variety of topics over the years, from chain saw and equipment safety, to preparing for hazardous weather events, tackling irrigation troubleshooting and auditing, and even fire safety, thanks to our city firefighters, (with some of these events, I can travel back and share at a later time).

This Spring was no exception, we had Matt Giese, from Syngenta come speak to our golf course maintenance staff, (we have three golf courses with 15 full time staff, 2 contract employees, and depending on the time of year, another 15 or so seasonal and part-timers).  Matt had previously spoke to our superintendent chapter about calibrating sprayers.  I checked with him to see if he could provide this same presentation to our staff, and he happily agreed to do that, along with helping us with spreader calibration.


Spreader calibrations we had already worked on the previous spring at my facility.  We have Andersons, and Scotts spreaders, (for the youngsters in the business, Scotts many years ago had sold much of their professional turf and golf line to The Andersons, including their spreaders), and having a couple of different models posed some concerns for us when using the spreader settings on the bags for our starting points.  So in 2018, we used the calibration tool that came with our Anderson's spreader and calibrated it and our two older R8-Scotts spreaders, (by the way, for some reason, the two spreaders the crew will grab first).  After we used the calibration tool, we set up all three spreaders with the same amount of fertilizer, and each of us spread that out on our 60 x 80 turf plots next to the shop.  All three put out the proper amount of fertilizer, so we knew they were adjusted properly.


What we really learned from Matt's presentation was fertilizer distribution.  Is the fertilizer or product being distributed evenly across the area we are applying it over.  Matt had as his tools for this part of the demonstration, was some rain gauges, and a fertilizer calibration tray system.


Scotts spreaders have a cone device under the hopper, to evenly distribute the fertilizer particles.  They will provide the proper cone setting on their products, but when it comes to using other products, we tend to guess.  I will usually check a similar Andersons product and go with their cone setting.


What we found out with the calibration testing, this cone setting doesn't always hold true.  We were using another brand of 25-0-5, with an SGN of 205, we used their setting of M on the bag, and we usually will use a cone 6.  After finding out that more product was distributed to the left of the spreader, we found a similar sized Andersons product with a cone setting of 4, that actually made the distribution pattern worse.  We went the other way to a cone 8, which is usually reserved for 125 -150 SGN sized particles and we came out with a more even distribution pattern.  Below on the left is the results of the first run, on the right, our third run.  We also learned the effective width of our pattern.  After we had concluded on our cone setting, Matt had measured out a test run, we weighed the material before putting it in the hopper, made our test pass, and then measured what was left in the hopper.  We found out our speader was still calibrated properly when it came to putting out the proper amount of product.


After our spreader calibration trials, we moved onto sprayer calibration work.  We started out making a test run over a measured area, to find out our miles per hour of the sprayer.  We measured our boom widths, our height of nozzles from the ground, and lastly we would collect water coming out of the nozzles in the time it took our sprayer to cover our measured area.  What we found out was the sprayer was putting out the correct amount of water, for the measured area.  (We were looking at 40 gallons per acre, and we were at 41 - 42 gallons of water per acre).


The one part of sprayer calibration we wouldn't able to really show was the nozzle spray     pattern because of the high winds of that day, (fertilizing calibration was done out of the wind behind our maintenance building.  Matt has some test paper that would show the spray pattern, but we were unable to test that.  We did make a test run on some asphalt and it showed a good pattern, with an even dry down on the pavement.

All in all, my staff enjoyed the presentation.  Much thanks goes to Matt and Syngenta for supplying pitchers and rain gauges for measuring our products.  We were reminded the importance of calibrating our equipment, and found that ours was still adjusted properly.  

Sunday, August 26, 2018

Storm Damage

Time as slipped by these past weeks, as staff has started leaving or working less hours as they head back to school, family obligations, such as, Dr. Appointments (eye and dentist), school shopping, a quick 3 day vacation to Indianapolis for Drum Corp prelims, and helping the move back to school, projects getting done, (was going to post a specific project we worked on, but trying to squeeze it in before the vacation days, I wouldn't have done it justice), superintendent chapter volunteer obligations, watching the exciting PGA tournament finish, and just running around kept things busy.


First some pictures from our trip to Indy.  First time at Lucas Oil, but we spent many of times driving by on our way to visit family in Indiana or when we would come back from World Percussion Championships in Dayton.  The dream of the boy and us was he would be marching with a Drum Corp in Lucas.  We had attended a couple of audition camps through the years, but not this past one.  He did do winter percussion this past winter, but didn't try out for DCI.  I think the trip was a little bittersweet as he saw people he had auditioned with in the past, and with his making a winter percussion group this past season, it was probably his best chance to march in the summer, alas this was his age out year, the last year he could have marched.  The second picture is him checking out the field for the first time, the third is a picture of my favorite corps, Casper Troopers, one of the ones he had auditioned for.  His favorite is Santa Clara Vanguard (mine too back in the days of the late 70's when we watched on PBS), this year's champion.  I think it's important to spend some family time together, especially before he headed back to school, I think getting away from the course for a few days refreshed me as well.    

 The view as we are crossing the river into St. Louis, I was following the PGA via Tiger Tracker and other superintendents who had spent the week volunteering at the tournament, this was right before play was called.  we turned Southwest on I-44 and avoided all the rain that was plaguing the tournament.

We did hit some rain before we arrived home, where it had really poured.  There was some wind as well, but we weren't sure of the extent, until later that evening.

After we had arrived home, I knew I had to go back to the course, because the forecast when we had left that previous Wednesday had not called for the rain we had received, and the irrigation computer was set to run.  Upon arriving at the course, I shut the computer off, and went out to turn off three controllers that are not communicating with the computer.  At that time I saw we had received 2.5" of rain, and did see some debris down, but it was dark by that time.


The next morning we were greeted with branches and debris everywhere.  With the greens full of leaves, we concentrated first on clearing them and tees with blowers and picking up the loose branches.  The rain had come down so fast the night before, and we had been so dry, it was possible to allow carts and golfers to play, and with the nice cooler weather they did.


With greens cleared on day one, the next day we mowed greens and collars and approaches.  With just two of us in that day, we continued with picking up smaller branches and debris and blowing off fairways.  On Monday, which was another day we were short handed and had two of us in, we concentrated on mowing fairways and greens again, spraying greens, picking up branches and blowing debris further into the rough.


Tuesday and Wednesday when we had the most staff members in, we were able to set the course up for play and the crew really attacked the larger items needing removed by chainsaws.  Above are some of the small trees and larger branches or tree leaders that had broke.  Below was our nicest Ginkgo tree where the top had blow out of it.  Of all of our Ginkgo's, Murphy's Law I guess dictated the nicest one to be damaged.  I didn't even realize it was a Ginkgo, it was such a big and nice tree.  Our park's tree crew did say that it will live for short time until it starts rotting out from the missing top.  It might give us some time to get a new tree in it's place before we have to remove it all together.


We were able to finally repair and rake our bunkers on Thursday, all in all the crew did a nice job, and our customers didn't have any complaints about course conditions during the clean-up.  I attribute that to the prioritizing of cleanup and regular maintenance returning to greens and tees first, then fairways. Also to the crew's constant work, the golfers seemed to appreciate their efforts.

The next step will be the tree crew coming and removing some of the hangers in the Sycamores up where we can't reach them, assessing the health of the trees remaining, and looking at getting replacement trees in place for trees we lost or will loose in the future.

As always,

Thanks for reading!

Mel